


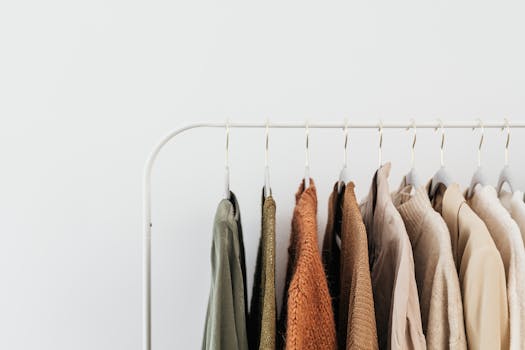

The overflowing closet. It’s a familiar sight for many, a chaotic jumble where finding that specific shirt feels like an archaeological dig. We often accept this disarray as a permanent fixture, a testament to our busy lives. But what if I told you that a truly functional and aesthetically pleasing closet is not an unattainable dream, but a tangible reality achievable through thoughtful design and execution? Understanding how to build a custom closet organization system is the key to transforming that daily frustration into a morning of effortless style.
Many people assume custom closets are prohibitively expensive or require advanced carpentry skills. In reality, while professional installations exist, a DIY approach can be incredibly rewarding and surprisingly accessible. It’s about understanding your unique needs, maximizing your available space, and implementing smart solutions that work for you. This isn’t just about stuffing more things into your wardrobe; it’s about creating an environment where your clothes and accessories are easily visible, accessible, and protected.
Step 1: The Deep Dive – Assessing Your Closet’s Needs
Before a single screw is driven or shelf is measured, the most crucial step is introspection. This is where we get real about what your closet is actually holding and how you use it. Ignoring this phase is like building a house without a blueprint – you’ll end up with something functional, perhaps, but rarely optimal.
The Great Purge: Honestly assess every item. Does it fit? Is it in good condition? Have you worn it in the last year? Be ruthless. Donating or selling items you no longer need instantly creates more space and clarifies what you truly need to store.
Categorize Your Contents: Once purged, group similar items. Think beyond just “shirts” and “pants.” Break it down: long-sleeved shirts, t-shirts, work trousers, casual jeans, dresses, suits, activewear, belts, scarves, handbags, shoes (by type: heels, flats, boots). This categorization is the foundation for designing effective storage.
Analyze Your Habits: How do you get dressed? Do you tend to grab-and-go, or do you meticulously plan outfits? Do you have more hanging items or folded items? This insight will dictate the ratio of hanging space to shelving and drawers you’ll need. In my experience, most people underestimate the amount of hanging space required for everyday wear.
Measure Everything (Twice!): Take detailed measurements of your closet’s interior dimensions: height, width, and depth. Note the location of any existing features like light fixtures, windows, or doors. This data is non-negotiable for any successful design.
Step 2: Designing for Your Life – Planning the Layout
With a clear understanding of your inventory and habits, it’s time to sketch out your ideal closet. This is where the magic of customization truly begins. Think about flow, accessibility, and aesthetics.
Visualize Zones: Based on your categories, mentally divide your closet into functional zones. A “hanging zone” for dresses and shirts, a “folded zone” for sweaters and jeans, a “shoe zone,” and perhaps a dedicated space for accessories like ties or jewelry.
Hanging Space Solutions:
Double Hanging: For shirts, blouses, and folded pants, installing a second rod below the standard height can nearly double your hanging capacity. This is a fantastic way to maximize vertical space.
Single Hanging: For longer items like dresses, coats, or full-length skirts, ensure you have ample single-rod hanging space.
Shelving Strategies:
Adjustable Shelving: This is your best friend. It allows you to adapt your closet as your needs change. Aim for shelves that are deep enough to hold folded items without them spilling over, but not so deep that items at the back are lost. Consider shelf spacing that accommodates your tallest folded items (like sweaters).
Tiered Shelving: For smaller items or to break up large wall spaces, tiered shelving can be highly effective.
Drawer Dynamics:
Built-in vs. Freestanding: Decide if you’ll incorporate built-in drawers as part of a larger system or use modular drawer units.
Drawer Depth: Shallow drawers are perfect for socks, underwear, and accessories. Deeper drawers can accommodate t-shirts or folded pants.
Accessory Integration: Don’t forget the small stuff! Consider pull-out tie racks, belt hangers, scarf organizers, or dedicated jewelry drawers with dividers.
Step 3: Material Matters – Choosing Your Components
The choice of materials significantly impacts the look, durability, and cost of your custom closet organization system. There are several popular avenues to explore.
Modular Closet Systems: These are pre-fabricated units that can be combined and configured to fit your space. Brands like Elfa or ClosetMaid offer versatile systems that are relatively easy to install. They often feature adjustable shelving and a variety of accessories. This is a great starting point for a DIYer who wants a polished look without extensive custom cutting.
DIY from Scratch (Plywood/MDF): For the truly hands-on individual, building your own shelves, rods, and drawer boxes from plywood or MDF offers ultimate customization. This requires basic woodworking tools and skills. It’s often the most cost-effective option if you have the time and ability. Remember to factor in the cost of hardware, such as drawer slides and shelf pins.
Combination Approach: Many people find success by combining elements. For instance, using a modular system for the main shelving and hanging components and then adding custom-built drawer units or specialized accessory holders. This strikes a balance between ease of assembly and personalized features.
Hardware Essentials: Don’t skimp on quality here. Sturdy drawer slides, robust shelf pins, and strong closet rods will ensure your system stands the test of time and repeated use.
Step 4: Bringing It All Together – The Installation Process
This is where your planning comes to fruition. Even with modular systems, careful installation is key to a professional and durable result.
Follow Manufacturer Instructions (if applicable): For modular systems, adhere strictly to the provided assembly guides. Measure and mark carefully before drilling.
Wall Anchoring is Crucial: Whether you’re building from scratch or using modular components, always anchor your system securely to the wall studs. This prevents tipping and ensures safety, especially in households with children or pets.
Leveling is Key: Use a level at every stage. Uneven shelves or rods will lead to items falling off and a generally unkempt appearance.
Rod Placement: Ensure hanging rods are at a height that allows your longest garments to hang freely without touching the floor.
Drawer Installation: Properly installed drawer slides are essential for smooth operation. They should glide in and out effortlessly.
Final Touches: Once assembled, add lighting (LED strips are excellent for closets), consider decorative drawer pulls, and perhaps even some organizational bins or dividers for smaller items.
Step 5: Maintaining the Order – Keeping Your System Functional
You’ve built your dream closet; now the real work begins: maintaining it. A custom closet organization system is only as good as its upkeep.
The “One In, One Out” Rule: To prevent re-cluttering, try to adopt a policy where for every new item you bring in, an old one goes out.
Regular “Tidies”: Dedicate 10-15 minutes each week to a quick closet tidy. Re-fold items, put away strays, and ensure everything is in its designated spot.
Seasonal Reviews: Twice a year, perform a more thorough review. Re-assess what’s working and what’s not. This is also the perfect time to store seasonal clothing appropriately.
* Embrace Flexibility: Your needs might change over time. Don’t be afraid to make minor adjustments to your system if something isn’t working as well as it once did.
The Lasting Impact of a Thoughtfully Designed Space
Building a custom closet organization system is more than just a home improvement project; it’s an investment in your daily well-being. It’s about reducing stress, saving time, and creating a sanctuary where your belongings are not a source of chaos, but a reflection of your personal style and order. From the initial purge to the final organized shelf, the journey of how to build a custom closet organization system is a deeply satisfying one. It’s a process that empowers you to take control of your space and, in turn, your life. So, take the plunge, embrace the planning, and prepare to be amazed by the transformation.


